Tuesday, May 20, 2014

Tamales: the Mayas, Incas and Aztecs papillots


A legacy of the Pre-Colombian period...


First I would like to apologize for my absence on Travelling Papilles.
Those past days I did not stop blogging I published some recipes on Voyages des Papilles my blog in French. 
I realize that having two blogs is not easy! However it's a real pleasure as I like writing  in my two favorite tongues, French and English!
I also thank you again for your visit and nice comments that really motivate me..


With this Tamales recipe, I suggest you a trip to the Mayas and Incas pre- Hispanic time, a trip to the ancient world.

Historians usually date Tamales at the Pre-Columbian period and between 5000 and 7000 years before Christ!
This dish is a legacy of Mayas, Incas and Aztecs tribes.  
It has survived the centuries and came to us with any changes that usually occurred for ancient recipes.

Whatever the reasons, these changes have contributed to the simplification and improvement of the recipes.
And the Cuisines of the World have generally not escaped to this rule.

The Tamal in Nahuatl tongue (Aztec tongue)  «tamalii "which means " surrounded " was born from the ingenuity of the Incas, Mayas and Aztecs women in the Pre-Columbian era  when they were recruited as " Cooker " in tribal war camps.
The growing consumption of corn and the necessity for carrying easily the food have led these women to create the Tamal which could be compared to our modern sandwiches!

The Tamal could thus be cooked in advance and reheated or eaten cold if necessary.

Historians have identified a wide variety of Tamales from this period, from the most realistic to the most improbable (Tamales with beans, with fruits, frog’s tamales, ant’s tamales ...). 
And also different way for cooking the tamales; steamed, grilled in a Comal (South American griddle) or cooked in the embers etc.

Today Tamales are often steamed or cooked in water. They are consumed in most Latin American countries and have different names depending on the countries, Hallaca in Venezuela, Bollo in Colombia, Humita in Bolivia and Ecuador, Tamal in Cuba and Mexico...

Recipes also vary from one country to another or within the same country from one region to another.
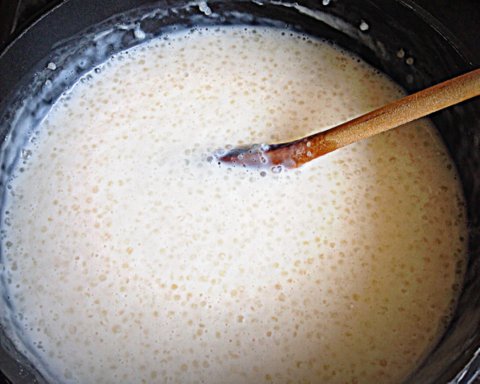
The Dough (masa in Spanish) which is an essential component of this dish, is made with a nixtamalized* corn flour or fresh ground corn.
The dough and stuffing are cooked in dried or fresh leaves corn or in banana or avocado leaves.
 The leaves used should not be toxic.

The stuffing can be made of whatever you like, meat, and fish with vegetables or not prepared with a sauce, it can be contain cheese…  It’s really depends on the preferences of the cooker and of the family taste.

As it takes time to prepare tamales, in the Latin American community   each member of the family or friends give a hand to prepare them.
Large amounts of Tamales are then prepared and frozen to be consumed later.
This is what I did.

I wanted to share this recipe with my french readers on Voyages des Papilles because in France our kitchen is not influenced by South American culture as it is the case for the United States of America or Canada. This is explained by geographic distance. 
The Tamales and their great story are little known in France.

I offer the simplest version of tamales and also my own version.
Feel free to use fresh ground corn to prepare your tamales as desired.


Note: About *Nixtamalisation


Nixtamalization is an ancient Mesoamerican process by which corn kernels are soaked and cooked in an alkaline solution, usually lime water (or more traditionally a mixture of wood ash and water). This process weakens the transparent outer hull, the pericarp.
This method has many advantages, control bacterial activity,and improves the nutritional value.
The product of this process is called nixtamal.
Lime water gives it a characteristic taste. It is ground to obtain a pulp or nixtamal "masa".


For the papillots, you have the choice between dry or fresh corn leaves, banana leaves, aluminum sheets or a plastic wrap.
I do prefer corn leaves, they give a nice taste to the dish.
You will also need a steamer to cook the tamales.


Ingredients: (for about 10 to 12 tamales)

For the dough:

  • 235 gr nixtamalized corn flour (Maseca)
  • 40 to 45 cl of vegetable or chicken broth
  • 35 gr soft butter or lard (optional, I did not use any)
  • A pinch of salt
  • Oil for greasing the sheets


For the filling :

  • Half a roast chicken
  • 4 stalks celery
  • 3 leeks
  • 3 to 4 beautiful carrots
  • 3 turnips
  • 1 onion
  • 1 clove of garlic
  • 2 bay leaves
  • 3 cloves ( optional)
  • 1 tablet of broth
  • 1 small can tomato paste
  • Parmesan
  • Oil
  • Salt


Preparation:

Start with the stuffing.

Wash the vegetables peel and cut into julienne the carrots and turnips.
Cut the leeks and celery into rings.
Peel the onion and garlic and dice them.
In a saucepan over medium heat, heat a tablespoon of oil.
Brown the onions, garlic and vegetables. Stir well.
Add the tablet of broth, the tomato paste and pour water.
Season the sauce with cloves and bay leaves.
Taste and add salt if needed.
Cover the pan.

Shred the chicken.
When the sauce has reduced a bit, add the chicken.
Stir well and let reduce a little.
Take the pan off the heat.
The stuffing should not be dry. It must remain a little sauce.
Grate the parmesan and add it to the stuffing.


Prepare the masa dough.

In a bowl, put the flour, a pinch of salt, butter or lard if you want to add some.
Pour the broth gradually to form dough and knead at least 6-8 minutes.
Let the dough rest for five minutes.

If you use dry corn leaves, in a large saucepan bring water to a boil and remove from heat.
Soak the leaves until they become soft.
Discard the water and keep the leaves in the pot so they do not dry out.
Fresh leaves do not need this treatment, simply rinse them with clear water and dry.

Finally, if you do not have leaves, you can use foil or plastic wrap.
Dry the leaves.

Using a brush and a little oil, grease the corn sheets or foil.
Take a little amount of dough, flatten into the leaves and add the stuffing.
Gently close the foil and tie with a cooking string without pressing too much.
Proceed in this way with all the dough.


Cook the tamales in the steamer for about for 1h30.
Serve them hot in their leaves with a salsa sauce and vegetables.


tips:

To save time, get help from all family members.
Invent and create your own tamales, add whatever you like, leftover meats, and roast lamb, fish, vegetables etc.
The meat should be soft.

Finally you can easily replace corn flour by polenta. It's not really authentic, but what not?
In this case, cook the polenta as you usually do before. The paste should not be firm.
If you still have stuffing, you can make empanadas.


I hope you will enjoy this immersion in the ancient world!
Thank you for reading and for your comments.

Chantal


References:


  1.  Le maïs en zones tropicales, R.L. Paliwal, 2002.
  2.  Pre-Columbian Foodways: Interdisciplinary Approaches to Food, Culture, and Markets in Ancient Mesoamerica,‎ 2009 , p. 317
  3.  Nixtamalization - Making Masa and Corn Tortilla (You tube)


Tuesday, April 22, 2014

Coconut cream Tapioca pearls recipe


The Asian pearls...


I already told you about a dessert that I love and which is coconut cream tapioca pearls.
This is a Southeast Asian dessert widely eaten in Vietnam and China and also prepared in India.

Tapioca comes from the cassava root and is found in different forms in the world (fresh paste, powder, raw powder, granules ...).

According to the local use and recipes, many countries transform cassava.

In Congo (Center of Africa and the capital is Brazzaville), where I grew up, a dough like a polenta is made with powdered cassava and it replaces rice and pasta. This satiating paste is usually eaten with stews.But I don’t really like it as I don’t like polenta.

In West Africa, you will find a slightly granular powder cassava. It is called Gari. Cold water, sugar and peanuts added to Gari constitute either a dessert or a breakfast.

In Haiti where my mother is from, such as in the others West Indies and in some American Latin countries, cassava is sometimes cooked as a flatbread. This pancake or “bread” is a legacy of the Carib Indians.

To return to the tapioca pearls, they just started appear in Europe with the consumption of Bubble Tea. They are very fashionable right now.

I love tapioca pearls associated with coconut cream and served with fresh fruit as mango, pear , persimmon, ... and nuts , cashews , hazelnuts , pecans , almonds ...

Coconut milk and tapioca pearls are a dessert that can be adapted to a multitude of flavors. You can use vanilla, pandan flavoring or blossom water, rose water ... And if you do not like coconut cream, you can just use milk.

Notes:

Tapioca pearls can be found in Asian grocery stores.
At the end of the preparation, the pudding will have a sticky texture, this effect completely disappears once the cream kept cool.
In my recipe I used cow's milk but lactose intolerant people can use vegetable milk such as almond, rice or oats milk.

Here is the recipe.

Ingredients (4-6 people):

• 160 grams of tapioca pearls
• 360 ml of water (used to soak the pearls)
• 200 ml coconut cream
• 50 cl semi-skimmed milk
• 80 to 100 grams of sugar

To serve:

Fresh fruits and nuts of your choice


Method:

Rinse 160 gr of tapioca pearls and soak in 360 ml of water for about 20 minutes.

Heat a large saucepan over medium heat, pour in the soaked pearls with the remaining water (the pearls will absorb water) and add the milk.

Using a spatula, stir constantly as you would do for rice pudding.

The preparation will thicken fairly quickly and the pearls will become transparent. They are cooked and it takes about 10 minutes.

Add the coconut cream to the mixture, I used 38 % fat coconut cream but the regular one is also perfect.

Stir well.

Turn off the heat and add the sugar.
I add the sugar at the very end of the preparation to prevent the mixture from caramelizing and give the preparation a brown tint.

Allow to cool, place in a large bowl and store in the fridge about 3 hours before serving.

If the cream is a little bit compact, before serving you can add a little milk but if you respect the measurements you won’t need doing it.


I usually enjoy this tapioca pearls cream with fresh mango cutted into cubes and some nuts. Sometimes I add a tablespoon of maple syrup on the top!


tips: 

For a hot/cold effect, I warm cream in the microwave for 30 seconds before serving and I added fruits.


I hope you will enjoy this recipe as I do.
I thank you for your reading and sharing,
Chantal


Friday, April 11, 2014

Vietnamese Bo Bun and home sweet home


I first would like to apologize for my absence from the blog, I went to the Bahamas for holidays and I came back in France yesterday.

 To describe the end of the holidays I always have ​​formulas like " All good things come to an end " or " You should come back home to leave again," So this is my way to give me the courage to come back to a normal life . 

 It is on those words that I conclude my vacation. And as usually we think that holidays are too short. We would  like to have more time to explore , to have a rest, to enjoy ...
However, I' am happy to come back and meet with my relatives, family, friends and your blogs.

 To celebrate this return I wanted a meal that I love, the Vietnamese Bo Bun salad.

Of course nothing to do with Bahamian dishes that I've eaten.
I will devote an article to the Bahamas in the Travel section of the blog and I have the opportunity to talk about their friendly and nice people, their cuisine and their beautiful beaches .

Bo bun is a fragrant and fresh Vietnamese salad that contains cold and hot ingredients, raw and cooked as well.

I love Bo bun for its simplicity but also for the freshness of its ingredients.

Notes:


Most ingredients  for Bo Bun can be found  in the supermarket.

You can find fried onions  in Asian groceries.

Here's what you 'll need to make a Bun Bo :


Ingredients for 4:


  • 500g tender beef fillet
  • 500g vermicelli rice or soy
  • 6 spring rolls cooked ( optional)
  • 3 large carrots
  • a cucumber
  • A handful of bean sprouts (optional)
  • A nice lettuce
  • Mint leaves
  • Coriander leaves
  • Fried onions or crushed roasted peanuts
  • Nuoc mam sauce (or sauce for spring rolls )
  • oil
  • Salt and black pepper


Method:


Boil a liter of water with a little salt. Remove the water from heat and pour in the noodles .

Soak and drain 6 minutes later. 
Dry the remaining water in the noodles  by keeping the pan a few seconds on the fire off. 
Set aside.

Wash the vegetables, peel and cut into fine sticks 4 to 5 cm .


Wash the lettuce, dry it and cut roughly.


In a large skillet heat a tablespoon of oil and cook the meat on both sides to your taste (I prefer my meat cooked rare for Bo bun ). Season with salt and pepper.

Cut the meat into pieces of about 4 cm and set aside.

Take 4 large bowls and divide equitably the green salad, the meat, the noodles, the carrots, the cucumber and the bean sprouts . Add pieces of cooked spring rolls .


Sprinkle with mint and coriander leaves washed and finely chopped .


Sprinkle each serving with crushed peanuts and fried onions.


Drizzle with nuoc mam sauce.

Serve immediately .

tips:


You can marinate the meat first with a tablespoon of fish sauce,  a teaspoon of rice vinegar, chopped lemongrass, and a little garlic puree .


I hope you will like this fresh and fragrant salad.


I add some pictures taken in San Salvador (Bahamas) .


Thank you for stopping by here and for your comments
Chantal


Friday, March 28, 2014

Sweet potatoes bread


A sweet potato breakfast...


Today I offer you a sweet potatoes bread recipe. I was inspired by English muffins to make this recipe. What I like here, is to use sweet potatoes in a different way from what I have seen in my childhood. 
Indeed in Brazzaville (Congo, Africa) where I grew up, the sweet potato is eaten boiled or fried. 
In Central Africa there is another variety of sweet potatoes which have a floury white flesh and not the orange color as what is sold in the West. And it is not cooked as cake or bread.

Sweet potato can be adapted to many dishes such as shepherd's pie, it can be served as mashed to accompany meat or fish and also as rösti as I have seen in Citron & Myrtille blog (Lemon & Blueberry). While in The Antilles (Haiti, Martinique, Guadeloupe) they make delicious sweet potatoes cakes.

So to achieve these soft rolls, here's what you'll need:

Ingredients  (for about 15 buns):

  • 200 grams cooked and peeled sweet potato
  • 420-430 grams of wheat flour
  • 7g/ 1tsp of dried yeast
  • 30 grams unsalted butter melted
  • 1 egg
  • 8 cl or ½ cup of lukewarm milk
  • 1 tablespoon liquid honey
  • 1 pinch of salt


Method:

Dissolve the yeast in lukewarm milk, put in a dry and warm place until foam appears on the surface.

Peel sweet potato, do put the flesh into medium bowl and mash.

Melt the butter.

In a bowl pour the flour and add a pinch of salt.

In the food processor pour the sweet potatoe mashed,the honey,the egg, and the melted butter, blend well.

Add the flour and  start kneading. 

Then add the yeast and blend.

Knead the dough for about 8 to 10 minutes until all the elements are well mixed.

If the dough is too soft gradually add about 10 grams of flour. 

The dough should be soft and smooth.

Form a smooth ball and lightly oil the surface of the dough. Put in an oiled bowl and keep the dough in a warm and dry place for 1 hour.

The dough has doubled in volume, lightly dust your hands with flour and knead the dough for about 5 minutes. 
Sweet potato contains a lot of water it tends to moisten the dough. Add a little flour if needed but not much. The dough should be smooth and soft.

Rub your rolling pin with flour and roll out the dough 2 cm thick on a floured surface. 

Take circles of dough with a cookie cutter about 5 cm in diameter. For larger buns choose a bigger diameter.

Place the circles of dough on parchment paper and let rest again for 30 minutes in a warm and dry place.

Heat a large nonstick skillet over medium heat and cook the buns, turning occasionally so they will cook on all sides. 

You can eat those breads with butter and jam or with savory dishes.
I've eaten mine with the grapefruit jam I made and with some salted butter.


I hope you will enjoy those buns.
Thank you for your reading and your comments.
I'll be happy to hear from you.

Chantal

Thursday, March 27, 2014

Cookie Cake Tatin and first Food Battle


This is my first participation in the Food Battle in France since the opening of the blog on February 8 .
This time the theme chosen by the site author  lagodiche.fr  is " The cookie dough ." She is also the sponsor of this 18th edition.

For those who do not know about this game, this is Carole from sunriseoversea.com blog that launched the first Food Battle several months ago. Since then, the tradition continues for our pleasure,participants or not.


Here is the list of participants:

Les cookines – Casseroles et clavier – Chocoframboises – Once upon a cook – Bavardages gourmands – Un flo de bonnes choses – De la peau au noyau – Trognon de pomme – Le blog de pouce – Pourquoi pas Isa – Mais pourquoi est ce que je vous raconte ça – Encore une lichette – La tasse fumante – Chez Ale – Radis rose – By ACB 4 you – Epices et moi – Marine en cuisine– Pause nature - La Godiche – Vanille et chocolats – Zéro miettes Mes instants de gourmandise – Tizi cooks – Les yeux plus gros que le ventre – Ma petite cuisine au quotidien – Framboises et bergamote – La ligne gourmande – Stella cuisine – Cuisine et cigares – Dans un petit coin de ma cuisine – Cook with love – Jujube en cuisine – La cuisine d’Anna et Olivia – Happy food –Mes petites fiches cuisine – La médecine passe par la cuisine – Des recettes à gogo – J’ai toujours aimé le jaune moutarde –Cooksmopolitan – Le bistrot de Jenna – Chic, chic, choc…olat – Piment oiseau – Les haricots diaboliques – La galerie du régal –La petite cuisine – J’apporte le dessert – Par faim d’arômes – J’amène le dessert – Safran gourmand – Pincée de fantaisie –Chut je pâtisse – Voyages des papilles – Homemade Maurylise – La vie Lilloise – Mon petit coin de cuisine – Manouchoux –Plaisir et équilibre – Un amour de recettes – Sweet mood in Paris – Cooking n’ co – Kalou & Cook – Les petites miettes d’enfance – Delicious Rdv – Invitation au fait maison – Les recettes de dessert d’Anaïs – L’ornithorynque chafouin - Dollyjessy -Pourquoi je grossis – VG Zone – Click, cook and taste – 13 desserts, chacun – Beauty and cook – Cook’n blog – Handmade by Anna – The happy cooking friends – Babeth’s cuisine – Citron myrtille 

I also take this opportunity to thank everyone, family, acquaintances , readers, friends, and food bloggers  for your reading, for the welcome you have given me and your kindness. It is a world that I did not know two months ago and I already feel part of it.

For this Battle, I made a Tarte Tatin using the cookie dough instead of puff pastry.

We owe the Tarte Tatin recipe to the Tatin sisters who ran a restaurant in Sologne (France 19th century). Their tart burnt so the sisters have kept the caramelized apples and have decided to coat  them with a puff pastry and then baked again.
The Tarte Tatin was born! It is a French classic.

I used the Sally cookie cake recipe from sallysbakingaddiction and I applied the classic recipe of caramelized apples ( sugar, water, butter).

 So here is the Cookie Cake Tatin or in French the Biscuit Tatin.


Notes:

You will need about 1h30 for this cake.
It is rather easy to achieve. You just have to carefully check the cooking time.

 Here's what you need:

Ingredients ( for 6/ 7 people) :

For the caramelized apples :


  • Five big apples 
  • 120 gr of caster sugar
  • 2 tablespoons water
  • Small drops of lemon juice ( not too much)
  • 50g butter


For the cookie dough :


  • 260 gr all purpose flour
  • 15 gr/2 tps of potato starch or cornstarch
  • 170 gr soft butter
  • 1 whole egg and 1 egg yolk
  • 130 gr/ 1 cup brown sugar
  • 7 grams/1tsp of baking powder
  • 2 drops of vanilla extract
  • Nuts and /or chopped almonds
  • Chocolate chip cookies
  • 1 pinch of salt


Method:

Start with the caramel.

In a saucepan over medium heat, add the sugar, water and lemon. Bring to a boil and cook to obtain a light caramel
Add the butter after about 7 minutes.
Stir constantly. You will need about 10 minutes to get a caramel.

Wash the apples, peel and cut into quarter and place them rounded side  in a baking mould  lined with with parchment paper. Pour in the caramel.
Cover the baking pan with foil and bake first for 30 minutes at TH 6 or 350 Farenheit  and finish the next 15 minutes uncovered at TH 7 or 400 Farenheit.
The apples should turn brown.

Remove the apples from the oven and cover them*.
Do not turn off the oven, it will be preheated for cookies.

Prepare the cookie dough .

In a bowl, sift together the flour , cornstarch or potatoe starch , the baking powder and the salt.

In another bowl or in the food processor bowl , place the softened butter and sugar , whisk to dissolve the sugar (about 5 min).
Add the whole egg , mix well, then the egg yolk and vanilla extract .
Mix well after each addition.

Pour the flour gradually into the butter / sugar preparation and mix.

Chop the hazelnuts and almonds , add them to the dough and add the chocolate chips.

You can either lay the dough into a buttered and floured 26 cm springform pan or use small molds of your choice.
Whatever your choice the mold must  be half filled. The paste should be spread on about 2 cm thick. 

Bake your cookie cake for 15 minutes at 6 TH or 350 Farenheit.
The cakes cook very quickly. Their heart is soft and the edge is crispy .
Wait  for  about 5 minutes and add  the caramelized apples over the top of the cakes.
Serve cold or lukewarm with a scoop of vanilla ice cream or yogurt . 


tips:

*I maintain the mold of caramelized apples over a pan of warm water so that the caramel don't harden.
If the caramel is too hard , put it in a pan with a little water and reduce the liquid while stirring.

This cake is delicious. My colleagues enjoyed it.
I hope you will like it too. Thank you for reading.

Chantal